The key to any DIY project you're attempting for the first time is to practice on a gift for someone else so you can work out all the kinks by the time you make your own. So I made a lamp for my sister out of a whiskey bottle, using a lamp kit from Home Depot and a lamp shade that I already had from an old thrift store find. (I totally failed and forgot to take any pictures of the lamp kit I used, but it was a pretty basic one that cost about $15 including the separate lamp harp.) By attempting to make my sister's lamp, I discovered that I'm not really the person who successfully makes lamps. I'm the person who finds bottles and lamp shades and asks her husband to turn it all into a lamp. Because even though those directions on the lamp kit were pretty simple...it was literally like they were written in a foreign language to me. I don't know what happened, but a severe mental block was involved. In any case...we made a lamp.

The first step to turning your bottle into a lamp is to drill a hole for the electrical cord to go through. If it's a glass bottle, you're going to need a special glass drill bit. We found ours at Home Depot for $8; they had a variety of sizes and we picked one that was just slightly bigger than the cord so it wouldn't have too much room to slide around.

While the hubs drilled the hole, I sprayed water on the bit and bottle to keep it cool while the drilling took place.

I rinsed the inside of the bottle - the glass and water make it kind of funky - and let it dry completely in the sink. I don't have many pictures of the actual lamp-making process, but if you don't think the directions are written in a foreign language I think it's pretty straight forward.
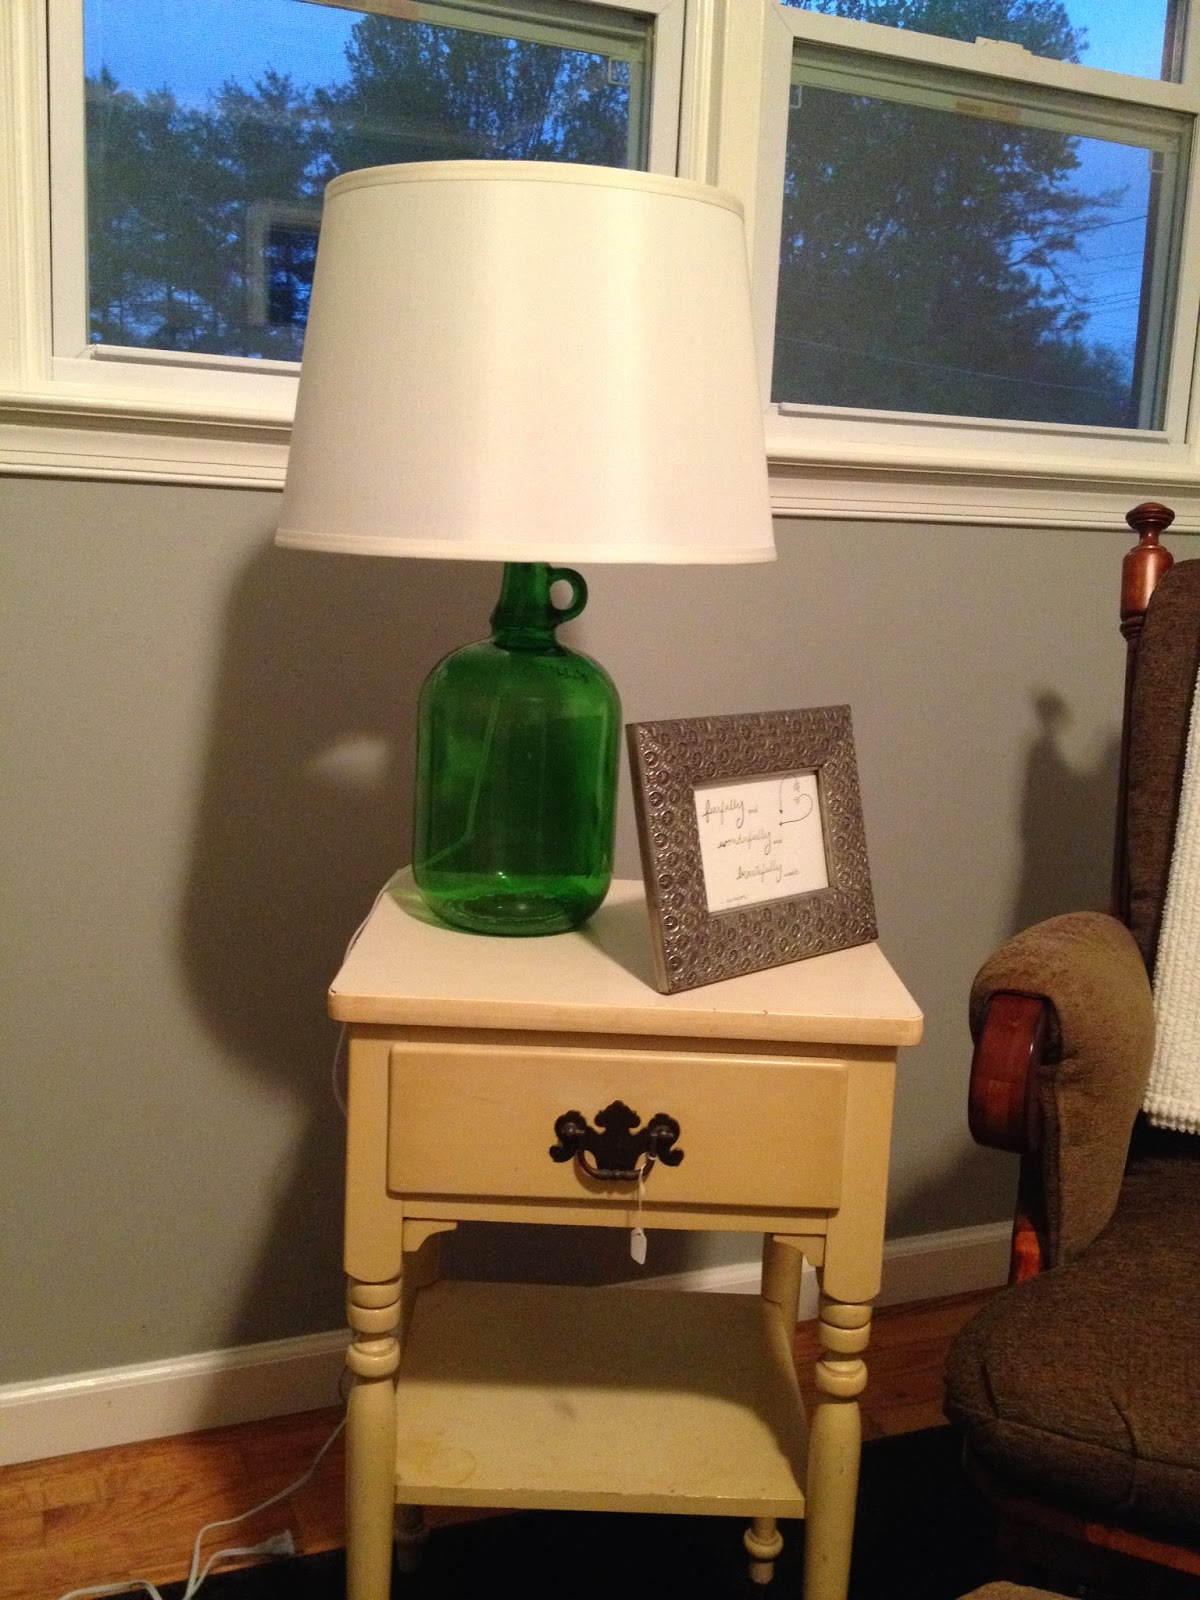
I had a lamp shade hanging around - also a thrift store find from back in the fall - that I loved and thought would be perfect for this lamp and the nursery. After the hubs had finished it and I put the lamp shade on...it didn't quite work.

Lamp shades come in two different forms: the part that rests on the lamp is at the top and needs a finial to attach it to the lamp harp, or the part that rests on the lamp is at the bottom and doesn't need a finial or a lamp harp at all. You can decide whether to include the lamp harp or not, depending on the shade you choose, when you're making your lamp, but you can't change the shade itself. This shade needed to rest on top of the lamp harp, and that made it way too disproportionate to the lamp. I wasn't a huge fan of the brass switch and such showing under the lamp. So I went on the hunt for a cost effective alternative. The shade I'd gotten from the thrift store was a mere $3...and I knew that the likelihood of finding a lamp shade that was a color, shape, and size I needed for this particular room at another thrift store was pretty unlikely. You kind of have to luck into those things and I was eager to get this crossed off my list. So, WalMart it was. Ten bucks, which is more than 3 but less than buying from most other stores, and I had my perfect shade.

One more project crossed off the nursery list! Next up is priming the black dressers so I can paint them soon. In the next couple weeks, four huge pieces of furniture (including that yellowed side table) are all getting painted, and I literally cannot wait to see the effect they make on the room. Having all the mismatched furniture in there is really messing with my color scheme right now, and I'm excited for it to all match. (Plus, I'm excited for how busy it will keep me when the hubs is away for work for a couple weeks.)
Here's our nursery to-do list now. It's been tweaked a little bit as I've made some new decisions and changed my mind on some things, meaning that some of the things that have been crossed off haven't been completed but have instead been eliminated or decided against:
- 1 Samuel 1:27-28 chalkboard
- quote for inside side table frame
- hang all pictures
turn green bottle into a lamprecover lamp shade? new lamp shade?- prime dressers
- sand side table
- sand cube organizer
- paint dressers white
- paint side table white
- paint side table drawer pull silver
- paint cube organizer
- make mobile for over crib
- paint metal pail for books
- clean out closet and closet drawers
- clean out dresser drawers
- line dresser drawers with contact paper
- organizers for inside of dresser drawers
- hem curtains and hang them...
or new curtains? storage system and bins- basket(s) for cube organizer
- get small lamp for changing table
- make/buy crib skirt
- metal trash can for diapers
basket with liner for hampershelf over storage system?- new overhead light?
- art piece above changing table
- large frame for showers
No comments:
Post a Comment